


Original Content Sourced from: Repsly
Written by Gabrielle Downey
Mastering merchandising requires juggling the many levels of displaying and placing. It can be easy to forget one of the components in the retail madness. Stay on top of your game with a merchandising checklist. This checkilist breaks down each component of in-store merchandising, so you never have to worry about overlooking an important step.
Download Repsly’s Checklist here >> Repsly Retail Audit Checklist
Windows
Windows give shoppers a sneak peak. They have the power to draw in or drive away. Share the story that will get customers in the store using the following elements.
- Theme: No good display is without a story. Tell your product’s tale with whimsical fantasies or futuristic adventures. However you design your windows, make sure they align with your vision.
- Color scheme: Set the mood with the color you choose. The color palette dressing your windows will send a message loud and clear. Decide whether you’ll use red to yell into the streets, or a cool blue to “whisper” to shoppers.
- Signage: Point consumers in the right direction (literally). The most explicit way to tell people what you want them to do is to spell it out. Make sure your signs are clear, visible, and informative.
- Type of window display: Know what type of window display will work best in your given space. Look into corner, semi-closed, elevated, shadow box, and island window displays to find out how to create the perfect design for your given space.
- Focal point: The eye will naturally be pulled to one area. But you have control over that! Pick the star of your show and be sure to make it the center of attention. This can be a big ticket item or one of your best sellers.
- Pick what doesn’t belong: Surprise! What’s that doing there? Add the element of intrigue by wedging in a subtle item that doesn’t belong. This can be as easy as a stuffed animal with mixing bowls. Being unexpected keeps customers lingering longer.

In-Store Displays
Once shoppers actually make their way into stores, they are confronted with a whirlwind of displays and signs trying to grab their attention. Don’t limit yourself to the displays that are already in place. Build out your own and take charge of merchandising.
- Digital displays: Techies rejoice! The best of ecommerce and traditional retail are upon us. Digital displays add the interactive element that engage consumers in the shopping process. These can include digital catalogues, virtual reality experiences, or online consulting.
- End caps: End caps sit on the the ends of gondolas and are the home for specialty and featured items. These are high sale areas and deserve attention when going through your merchandising checklist. Get creative with your end caps by highlighting seasonal products or hot, new items. Pick a relevant theme that corresponds to pop culture, holidays, or your product line.
- Standalone displays: These are convenient and customizable. Because standalone displays aren’t built into the store, they can be added or removed at any time. This helps with changing seasons and adapting to new merchandising goals. Use your imagination to build displays from your products into animals or objects to grab shoppers’ attention. Or, think of another untraditional way to feature your product beyond a bin or shelf.
- Height and width concerns: The eye first moves up and down before looking left to right. It makes sense to merchandise vertically to appeal to the eye’s movement. The consumer will see items at eye-level then look from top to bottom as opposed to moving across the display. Try using narrower and taller displays with the most important items at eye level.
- Sensory engagers: Create a sensory experience through your displays. Add a visually striking element, entice with the perfume of your latest fragrance, set the tone with some music, or allow the customers to be hands on with the products (ex. a tasting or a demo). This will engrain a memory that connects them to the brand.
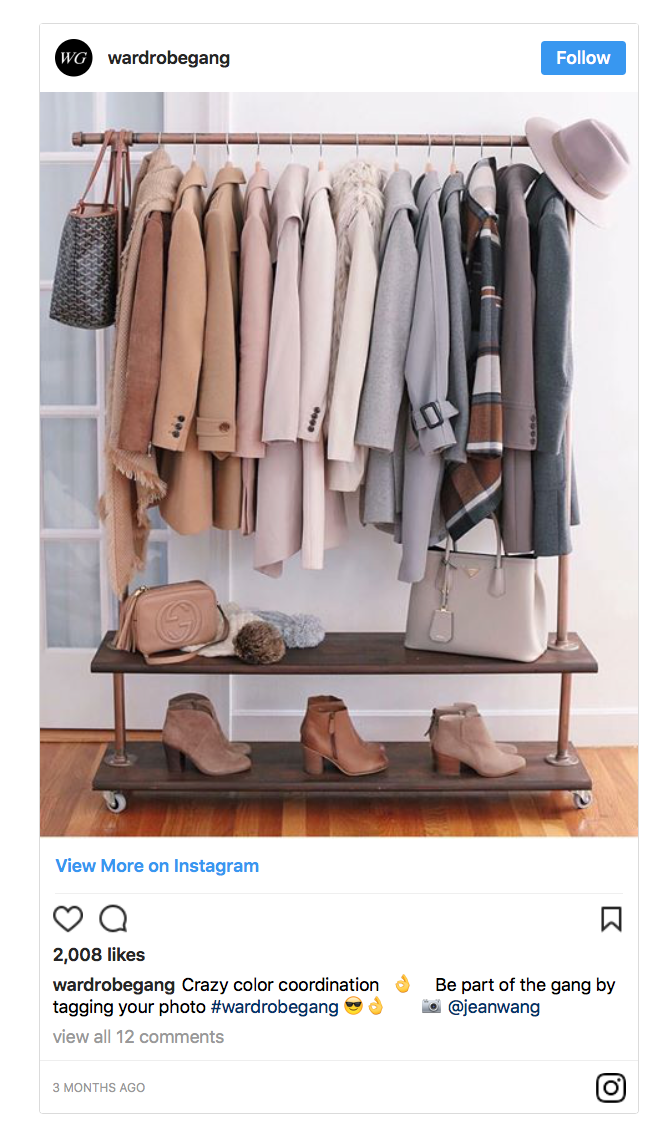
Racks
Racks (typically for clothing) are another way to organize a retail space. They are easy to add or remove and take up minimal space. They can also give customers a better feel for the product, since it’s not hidden on a shelf.
- Color spectrum: When merchandising items on rack, it is helpful to do a gradient of colors. Arrange them from lightest to darkest colors to appeal to the aesthetic preferences of consumers.
- Separate into categories: Pick a category and stick to it. This might mean one rack dedicated to pants, another to shirts, and so on. Or, it might be a rack of pinks, a rack of blues, etc. down the color spectrum. Use your judgement and product knowledge to hang products accordingly.
- Add descriptions: Sales rack? Last season’s items? Or, hot in this season? Distinguish the specifications of each rack to guide consumers to their desired destination.
- Declutter around the rack: Rack space is already tight. Don’t allow your racks to feel cramped and cluttered.Keep a clean space, so that nothing detracts from their display.
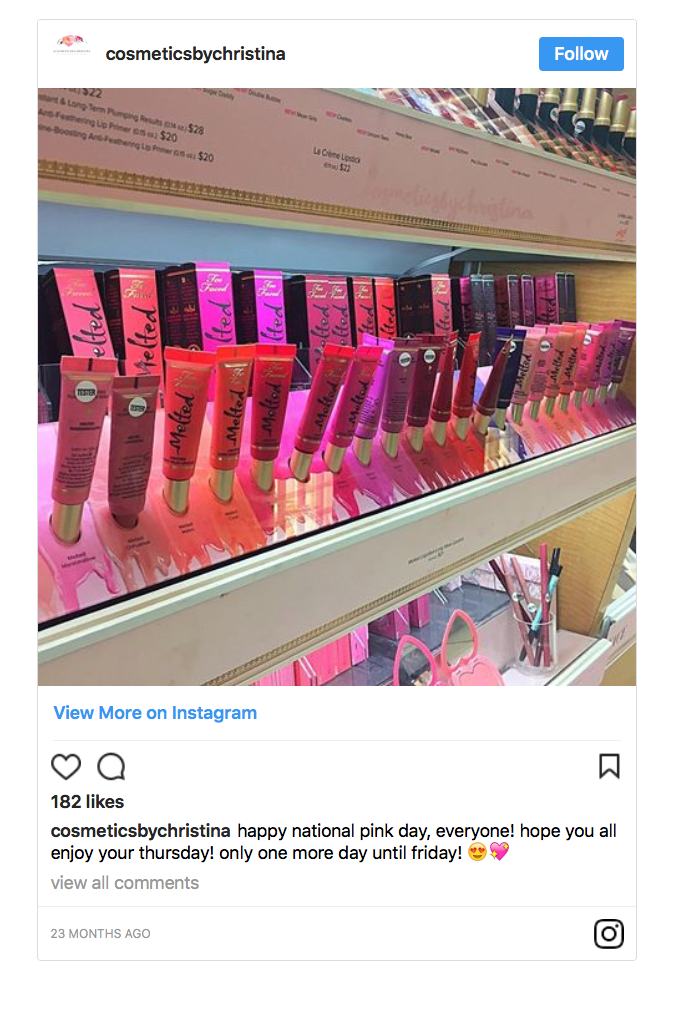
Shelves
Store shelves are prime merchandising real estate in any store front. Whether your brand is in supermarkets or department stores, your exposure, more than likely, depends on facings and shelf location. This is one part of the checklist you definitely don’t want to overlook.
- Stock: Make sure your shelves are getting some TLC. Are they full or full of gaps? Having shelves fully stocked means customers will never be without. There’s nothing worse than someone looking for your product and not buying it because you are sold out, or worse, choosing a competitor product.
- Facings: Maximise your in-store facings. With limited amounts of shelf space, there are different ways to add surface area. Try clip strips, cooler extenders, or knee knockers to get your product seen in more places.
- Planogram: One of the best ways to organize your shelf space is to plan ahead with a planogram template. A decisive layout can improve presentation and make the best use of a given space. Planograms make it easier to adhere to retailers expectations and regulations for their shelf space, turning compliance into a no brainer.
- Organisation: Ensure your shelf space is uncluttered and arranged sensibly. Don’t mix products that don’t belong together; cross merchandise or group products by category. You want prices to be visible and clearly associated with the product they correspond to.
Floor Plan
The retail landscape is the treasure map to your product. You don’t want customers to waste precious time just trying to get around the store. This can lead to distractions and confusion, ultimately deterring shoppers from discovery or accomplishing their mission.
- Traffic flow: Determine the type of floor plan best for your space based on how you want foot traffic to flow. Remove unnecessary obstacles that may restrict customers from getting to your products.
- Directional signage: Don’t make customers wander aimlessly. Put up helpful signs to guide shoppers around the store. You can direct them toward key products, inform them of sales, or provide better direction for customers maneuvering the retail space.
- Use a layout software: Much like a planogram, a layout software can simplify planning and optimize your resources. This kind of software can give you a flexible visual to experiment with before implementing a more permanent plan.
Make sure to execute your your merchandising flawlessly with this checklist. Want a further guide? Look at Repsly’s retail audit checklist (link under first paragraph) to mark off all the boxes for your merchandising strategy.