


Visual Merchandising is the art of organising product in such a way that it encourages customer interaction and purchase.
Visual meaning - relating to the sense of sight. Merchandising meaning – merchandising is a market practice in which the brand or image from a product or service is used to sell another.
When visual merchandising has been considered properly, it projects the desired image of the brand/store to the customer. It utilises colour, lighting, smells and sounds. It covers, floor plans, visual concepts, signage and installations.
The purpose of visual merchandising is to attract, engage and motivate the customer to making a purchase. In a nutshell, Visual Merchandising makes the store look better than it would without it, thus making a significant lasting impression on the customer.
By Natalie Coulter
10 Visual Merchandising tips for the retail space.
Action these tips and differentiate yourself from the store next door
- Personalise
The shopping experience has to be a treat! Whether the customer is wandering through an exhibitor stand or is in your retail space, 46% of customers will buy from a retailer who personalises the shopping experience. Therefore the in-store experience is crucial to a successful business and critical to the customer experience. Customers who shop exclusively in-store visit an average of 7.5 times a year vs whose who shop online and browse retailers an average of only three times a year. People shop where they are wanted so help the customer feel connected and welcome! Share yourself, share why you do what you do with the customer. Personalise the shopping experience, you can inspire, connect and inform the customer of your brand philosophy by way of signage, store presentation and display.
- Layout
Know your product and plan the layout of your store accordingly. Leave a clear line of sight from the front of the space to the back and side-to-side. Position the merchandise with lower items at the front of store and taller items towards the back and sidewalls. Use the space creatively and wisely, direct foot traffic and ensure customers can cover the entire store. Light the back wall and create some drama on it, this will encourage customers to view what’s at the back of store and by doing so check out your products on the way through. Ensure easy accessibility to all products. Group and display items that talk to each other.
- Fixtures
Think outside of the box for your store fixtures. Working with products that are hand made or reused can add a level of curiosity, interest and can be cost effective. ‘On trend’ fixtures can also add a freshness to any product. Once you’ve worked out your store style to suit your product, invest the time and money to get the fixturing right. These same fixtures can be reused time and time again and revamped by wrapping, covering, painting and layering with other materials to give them a fresh look at each event. 64% of retail sales come from ‘eye lines’, so in placing fixtures, understand where the optimum eye line is and display your hot product at this height.
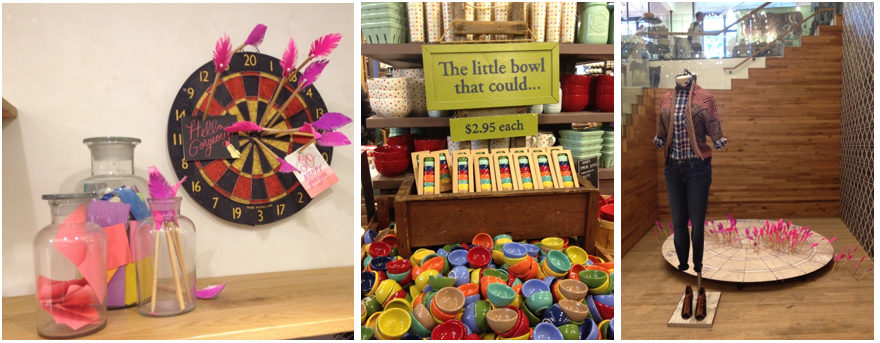
- Theme
Identify the connecting thread of all of your products, celebrate this thread and incorporate props and quirky pieces that tie back to the product.
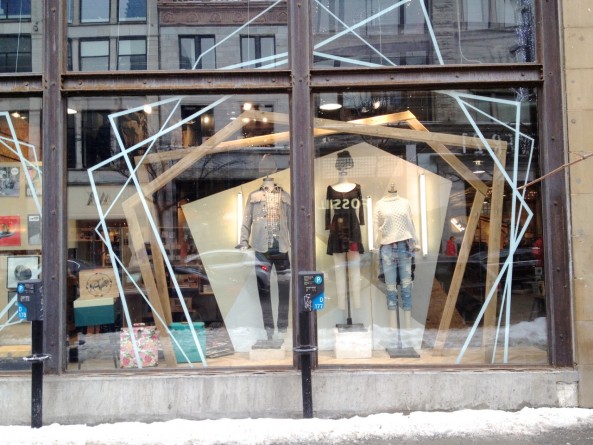
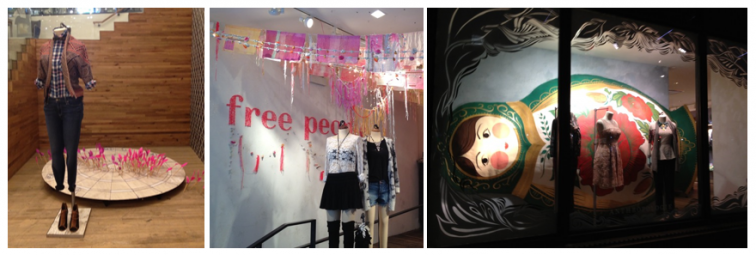
For example, Urban Outfitters Montreal started their concept installation theme at the windows, marking geometrical shapes with masking tape as the initial layer on the glass inside the window; wooden shapes were also positioned within the window space as the feature prop.
Looking into the window we see a layered effect of shapes. Old school records and fashion items were the featured displayed products within the geometric shapes.
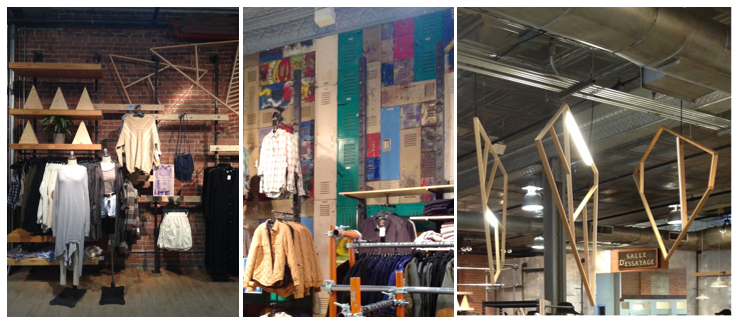
Inside the store geometric shapes made from the same materials were suspended from the ceiling in different areas of the store. The link from the old school records was represented in the brightly coloured school lockers that have become synonymous with this stores overall theme. Thus linking window to in store displays…mixing easy to construct and install props with vintage and new products themed together with reused materials.
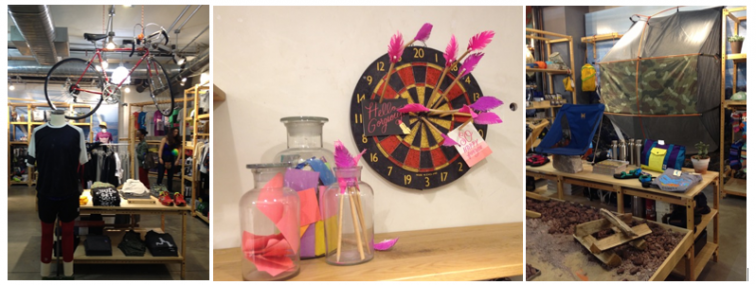
- Thread
Develop a thread for your display props and fixturing. Start at the window space for a store or the front display point. Link through the space a thread by way of props, texture and display. For instance white painted tree branches might act as a display fixture for bangles and necklaces on front display point, then continued as a prop in display cases and repeated at the back wall as a fixture of sorts for displaying bags, scarves and shoes.
- Negative Space
Allow for negative space in your store. Don’t overstock the store with so much product that the customer can’t feel your vibe. Edit your range. Too much product can be overwhelming for anyone making purchase decisions. Composition is key!
- Be the brand
Present yourself in the reflection of your product. Wear what you sell and find a way to be your brand. Retail your way! If wearing the product is not possible choose a colour or style to link to the stand in some way. Be part of the overall composition package.
- Navigation
Allow for easy navigation throughout the space. Direct your traffic. Increase the time customers spend in your store. Place different types, yet complimentary products next to each other to encourage items selling together. Squeeze out the value out of your store cost and imagine yourself the customer, think through their journey in your store. Retail is detail!
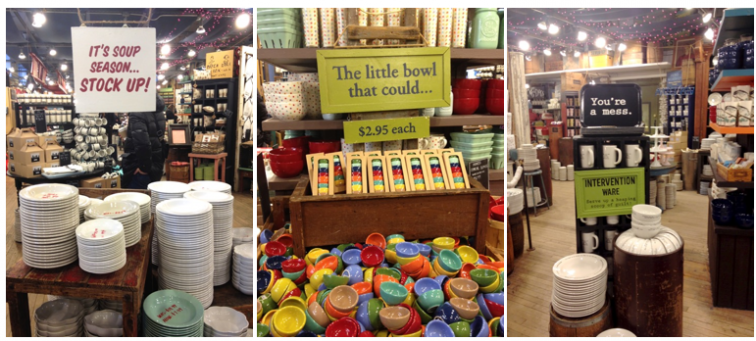
- Graphics and signage
Provoke intrigue and amuse the customer. The store signage and the design of any graphics should complement the overall design concept to make a clear statement of the stores identity. Highlight your branding and signage clearly in the space. Tell the story of your product and how it came to be with signage. Be authentic.
- Celebrate the creative process
Get creative, take pride in your store image and have fun! How your store looks depends on your planning and efforts. It’s important to think of it as a work in progress. Once you have covered all of the above you can stand back and enjoy your efforts, feeling a sense of accomplishment. As you experience the visual efforts you have put in be curious about what’s working best for your store. What doesn’t work will become obvious and you can tweak and change things up to better suit the space, your image and the demographic of your customer.
About the Author: Natalie Coulter is the founder of Belle Flaneur, an initiative that brings together artists, designers and students to collaborate on window displays, visual merchandising and art installations. Natalie also teaches units for the Visual Merchandising department at TAFE Sydney Institute, Australia. www.belleflaneur.com